HOW TO INSTALL POLYMERIC SAND IN AS LITTLE AS 4 STEPS
Sounds too good to be true, right? Well keep reading because we're about to share the secret on how it's done in this blog post...
In the past, a typical polymeric sand installation looked something like this: 1.) Pour the sand. 2.) Spread and sweep the sand. 3.) Compact. 4.) Spread and sweep again. 5.) Sweep and blow residue off the surface. 6.) Perform an initial showering of water. 7.) Shower again. 8.) Shower and rinse simultaneously. 9.) Remove excess water from surface with a blower.
We knew the process could be and should be faster. We just needed to figure out how to make it happen. So our Research & Development Team got to work ... Examining our polymeric sand. Examining competitive products. Scrutinizing the science. And pulling some very late nights in the laboratory.
And then it happened …
They discovered the recipe for a cleaner, faster, and much easier installation.
The key to improving our polymeric sand lied within the polymers themselves. By altering the particles at a molecular level, we were able to produce a second generation (G2) of sophisticated polymers, offering four tremendous benefits to the installation process:
- No Haze
- No Dust
- No Blower
- 1 Watering
G2 Intelligent Polymeric Sand eases and expedites hardscape installations by shortening the overall process to four simple steps.
How To Install G2 Polymeric Sand In 4 Steps
STEP 1: Spread the sand.
Spread the G2 Intelligent Polymeric Sand across the paver surface using a hard-bristle broom. Make sure the sand completely fills the joints (and do not use other materials in the bottom of the joints). Leave a layer of G2 on the surface to aid in the vibrating and consolidation of the sand into joints.
STEP 2: Vibrate.
Vibrate the G2 into the paver joints using a vibratory plate compactor. We recommend using a rubber pad to protect the paver surface. (Pro tip: A roller compactor is best to use for slab installations.)
The joints should be filled up to 1/8 inch (3mm) below the paver’s edge or chamfer. It’s best to compact in several directions to ensure there are no air gaps or voids in the joints. Repeat Steps 1 and 2 to ensure joints are filled and consolidated.
Keep in mind, narrow joints require more care to completely fill.
STEP 3: Sweep excess.
Sweep off any excess G2 Intelligent Polymeric Sand from the paved surface; first with a hard-bristle broom, then with a soft-bristle broom. Take care to leave the height of the polymeric sand at least 1/8 inch (3mm) below the edge or chamfer of the paver.
STEP 4: Activate with water.
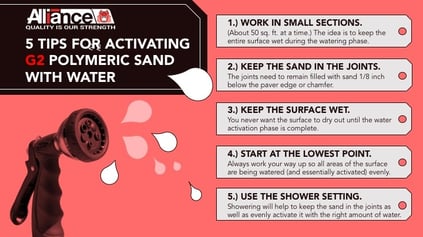
Activate the G2 by showering 50 sq. ft. sections at a time for one minute or until the sand is saturated from top to bottom (starting at the lowest point). Once all the sections are activated, rinse off any debris that is still on the surface.
For more tips on watering, read 5 Tips For Properly Activating G2 Polymeric Sand With Water.
By cutting the number of installation steps in half, G2 Intelligent Polymeric Sand will save you time and money. It’s a true game-changer for the hardscape industry.


