
Breaking Down A Polymeric Sand Job
Paver joint sand technology has come a long way. Did you know that installing Alliance’s G2 polymeric sand can be done in as little as four simple steps? In this post, we’re going to break down a poly sand job and show you how quickly and easily it can be done.

Step 1: Spread
First thing’s first: Make sure you have enough sand before you start pouring! The quantity of sand you’ll need depends on the shape and size of the concrete pavers, as well as the width of the joints. If you’re using G2 Maxx in Beige, Ivory, or Slate Grey, one 50 lb. bag will cover 65-85 square feet if the joints are narrow (1/8″ to 3/8″) and 22-42 square feet for wider joints (3/4″ to 1-1/4″). These values will be slightly less if you’re using G2 Maxx in Black Diamond. You can use our online Poly Sand Sand Calculator to enter the exact specs for your job and figure out approximately how many bags you’ll need.
Once you’ve determined you have enough product, you’ll next want to verify that the outdoor conditions are optimal for installation. G2 Polymeric Sand should be installed in temperatures above 32°F with dry conditions. A minimum of 15 minutes of dry weather is required after activating the sand with water in a traditional application. (Overlay applications will require 24 hours of dry weather post activation.)

When you’re ready to start spreading, pour each bag of sand evenly across its coverage area within the project. You can then spread it around using a hard-bristle broom. Make sure the sand completely fills the joints. (Note: There shouldn't be any other material besides the new polymeric sand inside the joints. If you’re replacing the joint material on an existing project, the old joint material needs to be completely removed prior to installing the new sand.) As you’re spreading, be sure to leave a layer of the G2 sand on the surface of the pavers. This will help aid more sand into the joints during the vibrating and consolidating process.

Step 2: Consolidate
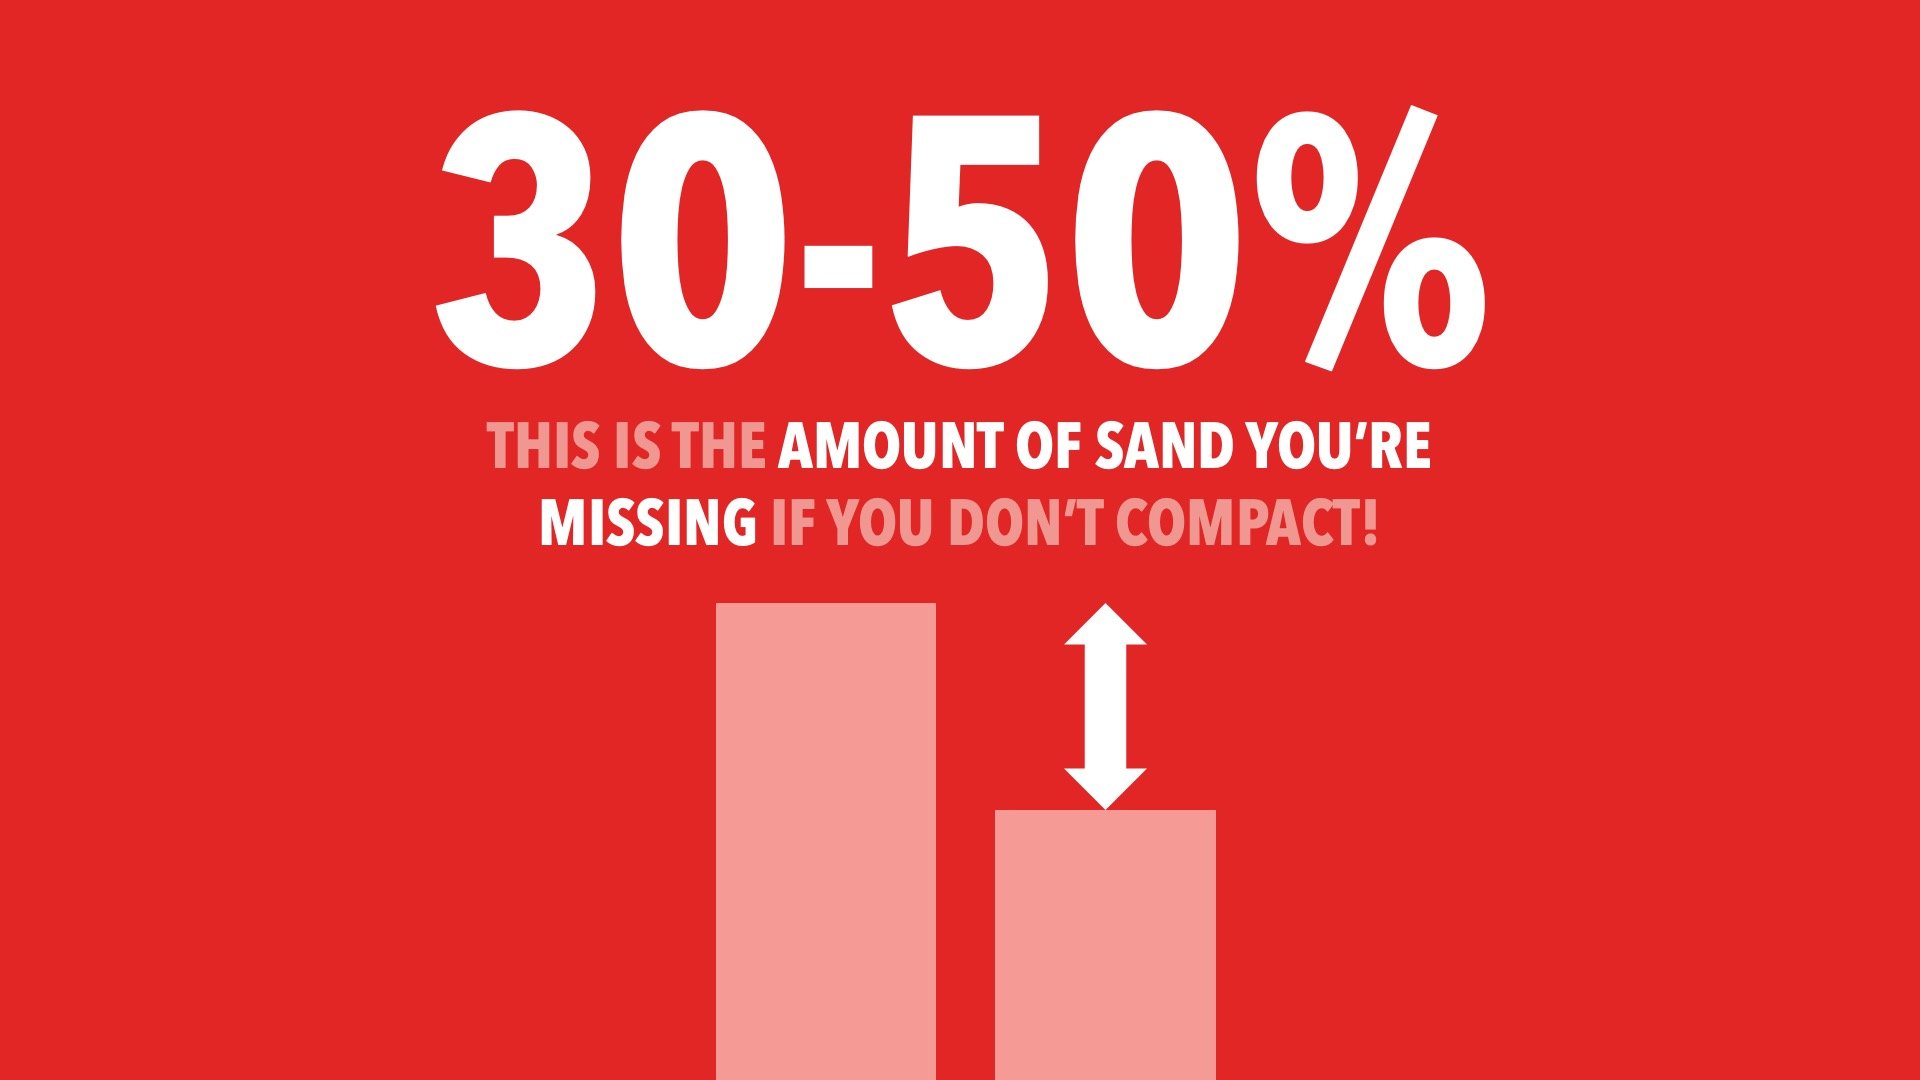
Did you know that between 30-50% of the sand will drop further down into the joint after an initial pass with a compactor? That’s why it’s imperative to never skip the step of compacting after you sweep the sand into the joints. It will help eliminate any void space and ensure enough product gets filled into the paver joints.
To compact the sand, we recommend using a vibratory plate compactor with a rubber pad. (A roller compactor is best for a slab installation.) It’s also best to compact in several directions to ensure there aren’t any air gaps or voids within the joints.

Another success factor for a polymeric sand installation is making sure the final height of the sand is below the surface of the paver. To avoid erosion and/or damage to the joints, cured polymeric sand should never be in direct contact with foot traffic or tires. The optimal height for the sand is ⅛” below the chamfer of the paver. You’ll want to repeat the steps of sweeping and vibrating until this height is achieved. (Note: Narrow joints will require more care to completely fill.)

Step 3: Sweep
The third step of a G2 Polymeric Sand installation is sweeping any excess sand off the top of the pavers. Why is this step important? Because any sand that gets left on top of the pavers will cure there after the final step of watering. To clean excess sand off the pavers, you can use a hard-bristle broom followed by a soft-bristle broom. A blower can be used as well. As you work your way across the paved surface, be sure an optimal sand height is maintained within the joints. Remember, the compacted joint sand should be ⅛” below the chamfer of the paver.

Step 4: Water
Misting used to be a common technique when watering polymeric sand. However, with Alliance’s G2 line of products, this is no longer the case. In fact, you really can’t use enough water when it comes to G2. A light watering will activate a small amount of the sand but won’t penetrate down deep enough to activate the entire joint. When this happens, a thin skin or crust will be formed where the water did penetrate but all the sand beneath it will remain completely dry … and not activated at all!
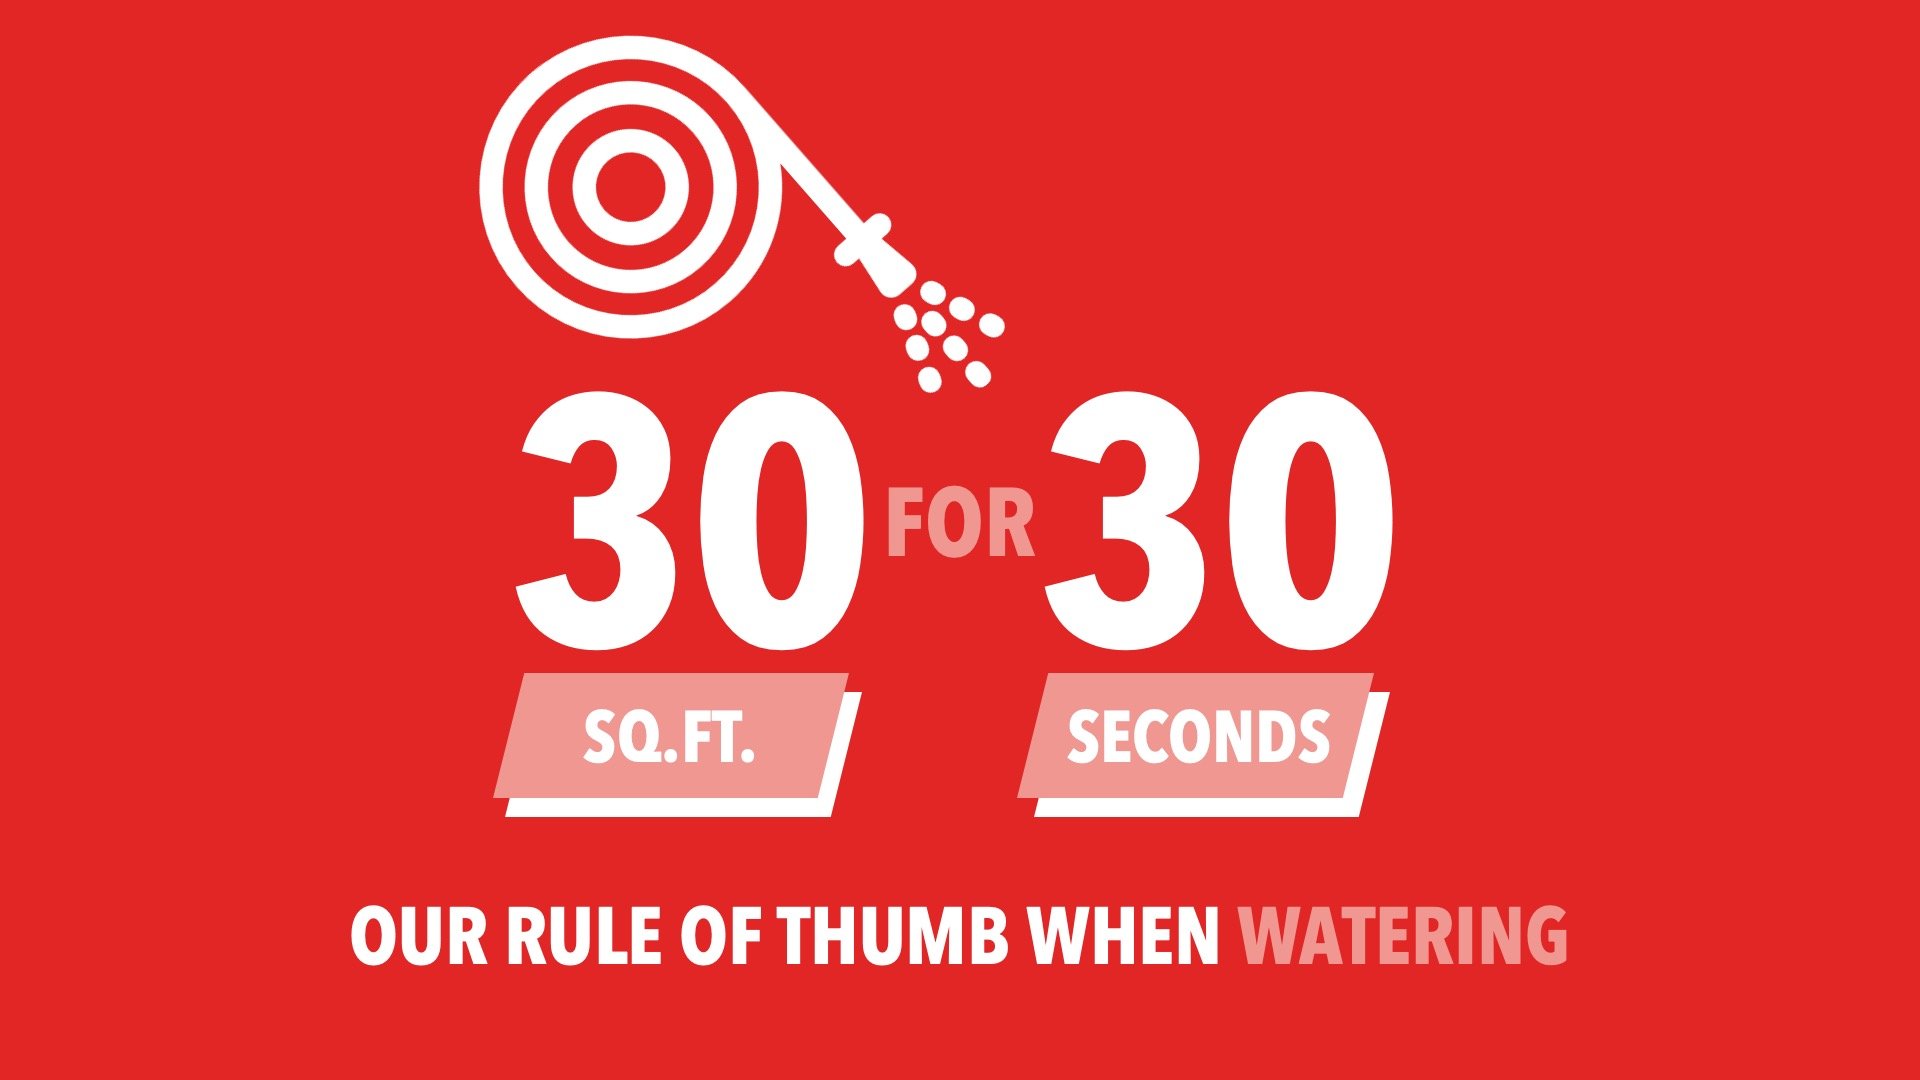
The key is getting enough water into the joint and fast enough. When watering, we recommend working in 30 square foot sections for 30 seconds at a time. You’ll want to use the Shower setting and water until the joint actually rejects any more water. (On projects with wider joints, this may take 60 seconds or more.) While this might seem like a lot of water, it’s truly what the product needs to properly activate.
Be sure to avoid using too much pressure when watering as this could cause the sand to wash out of the joints. Remember, the sand height should be ⅛” below the paver edge or chamfer.
All the water needs to get into the joint in one shot, and be completely activated, before moving to the next section. You’ll want to use extra caution and speed in hot, dry weather. If your project is sloped, you should work your way up from the bottom to ensure the lower areas of the project don’t prematurely start to activate when hit with run-off water.
And that completes the breakdown of our 4-step G2 polymeric sand installation process! If you’d like to explore polymeric sand on a deeper level, be sure to take our free Polymeric Sand For Dummies training on-demand!
